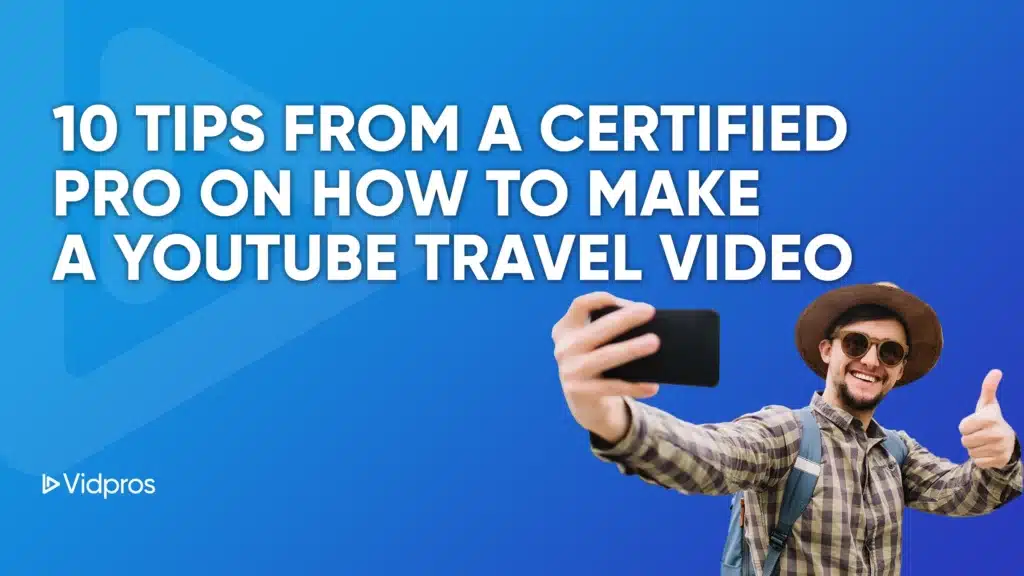
If you want to learn how to create jaw-dropping and click-worthy YouTube travel videos that go viral – it would make sense to learn from someone who has published almost 1000 inspiring travel videos and has built a big YouTube channel, right?
And that’s exactly what you will learn in this article – the 10 incredible filmmaking tips from Christian over at Lost Leblanc to help you create stunning travel videos right off the bat.
Between his two channels, Christian has been traveling the world and documenting his experiences on YouTube since 2015. He’s closing in on 1000 travel videos and 2.1M subs on YouTube.
So if there was someone to listen to and learn from on how to create travel videos – he is that person.
How To Make A YouTube Travel Video
The only prerequisite to start making YouTube video content today is access to a camera and the willingness to turn it on and hit record. So let’s dive in.
1. Know Your Equipment
![]()
The first tip might seem simple. But it’s a crucial building block in your filmmaking foundation. And that is to understand your equipment. And when Christian says understand your equipment, he means knowing how the camera gear you’re working with will impact the image output.
There’s a lot to learn – but here are some of the basics to know about your camera:
ISO
Shutter speed
Aperture
It’s okay if you don’t know what any of that means right now. But these settings impact the type and quality of images you can capture. Let’s go through a couple of examples: If you’re shooting with a GoPro, it’s a fantastic travel camera. And it has a really cool advantage – it’s waterproof.
So with that specific equipment, you have the upper hand of being able to achieve and tell a unique travel video story that most cameras will never be able to.
Wide Angle Lenses
Your GoPro also has a wide-angle lens, so you won’t be able to tell what’s going on in the distance. So even though something may only be 20ft away from you, it will appear like a speck in your video.
On the other hand, if you invested in, let’s say, on a T5i Rebel camera, something that can change lenses. Well, you can swap multiple lenses to achieve different shots, which means you must learn how each one works and when to use it.
You can attach wide-angle lenses to get similar results to a GoPro.
Ready For Your Close-Up?
You can also use zoom lenses which allow you to get extreme close-ups. A zoom lens not only lets you shoot things further away, but it also makes the subject appear closer to their background. So if somebody stands in front of mountains, the mountains become humongous.
Whereas if you shoot with a GoPro or wide-angle lens attachment, well, what it’s going to do is the exact opposite. It’ll make the mountains in the distance seem small, and the subject will seem big and upfront.
So understand how your equipment will affect the shot and plan accordingly. And the same logic applies if you’re shooting with a cell phone with two lenses.
Your Lens Also Affects Video Stability
If you were to pan with your GoPro, you would have a much more stable shot than if you used your zoom lens-equipped camera. Why is that? When you zoom in with a very distant telescoping lens, little shakes are amplified as small movements and trigger large frame bounce over large distances.
If you’re a gamer and you’ve ever played an FPS like COD or CS, then you’ll know your gun’s visual recoil while firing gets worse as your scope magnification increases. It’s the same logic.
2. Changing Gears

Travel vlog tip number two is to understand the difference between slow motion and fast motion – and when to use them. Because many people pick up their cameras for the first time, and they’re all excited to be able to film at five times slower than real life.
If you’ve got one of those new GoPros, you can shoot ten times slower than in real life. And it’s such a cool effect. But it’s not to be overused. The slow-motion should only be used to emphasize your story. If it doesn’t add to your story, don’t use it in your YouTube videos. Period.
The same can be said with doubling or quadrupling the speed. Here’s what Christian has to say about it:
“Sometimes I see people using drone shots, and they just go ten times the speed, and then suddenly they’re rushing through the air.
And it feels really weird because you can see the shake caused by the drone moving around, being pushed by the wind. You can see the waves are moving ten times faster, and it doesn’t look natural. It really takes away from the moment.
So if you’re going to speed something up with fast motion, at least make sure it’s part of the intended effect.”
Make It Feel Natural
If you want to speed things up, he recommends you cut your clip so it’s more of a gradual progression.
So to put this into practice, you could make five cuts. Start with normal speed. Transition to 2x, and in the middle, speed up to 4x. Then drop back to 2x, and finally back to normal speed.
What that does for you is it gives you a bit of a pyramid effect where it’s more gradual. It’s not this jarring speed-up, stop effect. It feels natural. More of a flow to it.
What if your camera doesn’t let you change speeds?
Honestly, if you’re shooting with a camera that doesn’t do fast motion or slow motion, don’t take that as a disadvantage. Sometimes the best stories are just told by shooting 30 frames a second. In other words, like normal speeds. Or you can play around with your clip speed while editing your video.
3. Are You Willing To Risk It?
![]()
Next up, it’s critical to change your angles. Whatever camera you’re shooting with, tells a different story than just the basic stand-and-shoot.
For example – have you ever seen someone post a picture of their dog?
That’s a rhetorical question. Unless you become a solo cave-dwelling monk for the rest of your life, someone will whip out their phone and force you to look at their pet photos.
So when they post their photo, it’s typically just a standing-up shot looking down at their dog. Why? Because people are lazy. They don’t want to get down on the dog’s level.
Do You Want Your Videos to Stand Out? Then Don’t Be Lazy And Boring
If you want to capture a better photo, you need to get down on your knees. You need to be willing to climb up a tree to get the above shot. You need to be willing to do whatever it takes, well, almost whatever it takes. Don’t die. But go the extra mile to create a unique story.
That is what separates a quality video from a masterpiece. The masterpiece will always have those unique shots that get the audience asking themselves – oh my gosh, how did they shoot that?
Listen to Christian talk about flying his drone:
“That’s why when I fly my drone, I actually like to risk it to get the biscuit once in a while. Sometimes I’ll fly between an archway. Sometimes I’ll fly right under a tree because I love to give my audience that scare factor of like, wow, you really changed up the angle in a way that I would never have done.”
Play Around And Try New Things
Get used to your equipment. And once you feel like you’ve mastered it, then you can start pushing the boundaries and trying new things.
And one more thing, changing the angle doesn’t simply have to be altitude based. It’s not just about getting on the ground or getting up above. It can also be about how close your subject is.
So, shooting with a wide aperture lens like a 50mm f/1.8 causes a beautiful background blur. Purely based on how close you are to the thing that you’re shooting, you can achieve different results with the shot.
So play around and have fun with your travel video ideas. Christian says it took him a solid one to two years to perfect his angles. It’s a skill you develop over time through experience. As long as you’re aware of it and willing to learn, it will make a massive difference in your video quality.
4. Music Is Everything
![]()
Music, music, music. Another biggie from Lost Leblanc is to be intentional with your music selection. Your choice of music can make or break your video.
You can evoke emotions in the audience based on the song you choose. So if you want to tell the story of a beautiful tropical beach, don’t use a hardcore EDM song because they completely clash. Unless that’s the effect you are going for.
But if you’re trying to tell a really high pace, high-energy story, that’s where you can look at the high BPM electronic music that gets the blood pumping.
There’s really no wrong genre of music to use, but whatever you select has to complement the scene and the story you’re trying to tell.
Also, make sure you get royalty-free music you can legally use. It’s crucial to know that every single song you use in your video will not be struck down by copyright – or get your channel demonetized.
Christian recommends you check out Epidemic Sound – which is where he gets his tracks.
5. Stabilize At The Source

This one is huge, as a lot of beginners often overlook this. To produce the best quality videos, you need to stabilize your footage.
Now, there are two ways you can stabilize it. One is you can stabilize it in your editing process. If you use powerful video editing software like Adobe Premiere Pro, you can achieve some pretty remarkable results on the final edit. But we won’t get into that here.
The best thing you can do is to limit the problem in the first place. You should focus on creating the most stable video inside the camera so you don’t have to rely on post-production cleanup.
So whether you got a cell phone or a GoPro, you can get a gimbal to achieve incredibly buttery smooth footage for as little as $300.
And it will be a game-changer in your footage. Now, if you’re shooting with a heavier camera, you can get heavy-duty gimbals too. But there are some strategies to stabilize your footage without the need for extra equipment. So let’s talk a bit about that.
Low-Cost Hacks To Capture Stable Motion Shots
One of the easiest ways to stabilize your camera is to use your camera strap. Put it around the back of your neck, and simply extend your camera forward as much as possible to apply tension on the camera strap.
And by doing this, you create more stability on the camera when you pivot. When you turn, your camera will not move freely in your hands. It will stay nice and stable by having more contact points against your body. You can use this to help out your walking shots, too.
Here’s another hack to create a moving, stabilized shot. If you have a flat surface you’re working with, then you can use a skateboard or rolling chair. That way, you’re not getting that up-and-down motion that comes with every step.
Instead, you just kind of roll around, and it’ll give you a much more stabilized shot. But the surface needs to be really smooth, or it will be janky.
And one last little bonus tip. Do you have a drone?
You can actually walk around with your Phantom or Mavic. Boom – steadicam activated.
6. Tell A Sequential Story
![]()
When filming and editing your travel videos, always ask yourself what story am I trying to tell?
Christian likes to have clips in chronological order for the entire travel video. Where it shows the travel that’s been going on over the past month or over the past week.
Don’t just insert random travel clips together over music. That’s going to get you a C or a B grade at best. But you will not be best in class by putting a video together that way.
What will help you, though, is, let’s say you’re traveling with your friends. And your video is kind of a day in the life through a cinematic eye.
Tell A Logical Story Your Viewers Can Easily Follow
Maybe it shows the start of your day – you hit the alarm clock to wake up. Perhaps it shows you put on your pants with a POV shot, but try to keep it PG with what you frame. And then maybe it shows you getting into the bus heading to the kayak station, where you then get in your kayak.
All of a sudden, you have different angles to work with. You add to it with an angle showing your paddle entering the water. You’ve got a wide angle that shows you leaving the shore. You’ve got another even wider angle that’s been shot with a drone. You can accomplish these things when you expand your equipment arsenal.
Of course, that doesn’t happen at first. But you can start to change angles with any camera. You can always change up the shot. You can always tell different stories from different perspectives.
And it’s vital to think about continuity when you put it all together. The way you sequence your clips should have a flow that builds into a logical and compelling story.
7. Be Smooth With It

So number seven is movement. If you’re shooting a cinematic sequence, you want to think of camera movement as one continuous motion.
Let’s say you’re shooting a nice pan. Your pan should be smooth and maintain a constant speed. You don’t want it to leap forward or suddenly jerk back.
A few exceptions exist where you ditch uniform speed and go for exponential acceleration. We’ll cover that in a minute. But for the most part, you don’t want random and sporadic movements. So eliminate the shake – it’s horrible to watch.
Use Continuous Shots With Drones
Another key example Christian sees from too many beginners is that when they fly their drones, they often use a clip of their drone where you see the drone readjusting.
Here’s what he has to say:
“So if you watch any of my travel videos, almost without fail, the only shots I use in my drone are the shots that are continuous. If I’m moving forward with my drone and tilting the camera up, if my camera stops tilting up, that is the end of the shot. Even though my drone may still be moving forward, that is a stop in continuous motion.
The worst is when I see somebody use a drone clip, they speed it up, and then all of a sudden, it just turns left. As somebody who’s made a lot of videos, that is one of the most horrible things I can see. What’s much better is if you want to do a turn, have it be a nice gradual turn.”
Hand Motions For Fun Manual Transitions
If you want to create exciting transitions, you can have some fun and use hand motions with your camera.
For example, you’re doing a pan shot on the beach. What you can do is end the pan with a rapid accelerated movement at the end. Kind of like a flick. Because you’re moving so quickly at the end of the shot, the human eye can’t keep up with what’s happening.
And this becomes an opportunity to cut the scene and transition to another shot that’s maybe panning in the same direction.
Teleport Your Viewer
And you can play around with this and pan in any direction. You can get some cool effects when you pan up into the sky, too. After the accelerated flick up into the clouds, you can cut to a drone shot. And it’s like all of a sudden, you’ve transported your viewer into the sky.
Or with underwater shots, that moment right when it goes underwater, the viewer kind of can’t see what’s going on. Because the waves and breaking of the surface both distort the shot. Cut that with a beautiful underwater swimming shot with a dolphin, and suddenly, it seems like this magical thing.
So get creative and ask yourself how you can make a unique transition within this moment?
8. Make It Dance To The Beat
![]()
Now that you’ve been creative and you’ve got some awesome shots, it’s time to sync them up with the music.
You want your chosen music to help tell that beautiful story of yours. How can you do that? When creating travel videos, starting with the song and working everything else around it works best.
Your video needs to build around the song because the song cannot be altered or changed. At least not easily. But you do have the ability to move your clips around. And so you find a song with the right mood, the right tempo, and the right amount of beats per minute.
Let The Beat Tell You Where To Cut
When there’s a well-defined beat in the song, it’s easy to cut to it. So every time you get that very audible sound of percussion or a drop, that’s a great indicator that this might be a good time to cut to the following clip.
Christian likes to let the beats per minute or speed of the song determine how many video clips he uses. So, for example, if the song’s very mellow, he’ll probably let each clip linger for three to seven seconds.
Whereas if it’s a high-paced song, then you’re going to be going through a lot more clips and individual cuts. Now, sometimes you can have two or three, or even four of these beats within every cut. But try to keep it uniform. It’s entirely up to you, but it’s about training your ear to hear the beat, then ride it.
It feels jarring when you get the timing wrong – and the video and music seem out of sync. Kinda like when you’re watching a video of someone talking, and their mouth movements don’t match the audio timing of what they’re saying. Brutal, right?
To find the right song, train your ear, cut to the beats, and your video will ascend to the next level.
9. To Get Pro Colors – You Need To Learn Color Grading
![]()
To highlight tip number nine, let’s talk about GoPro highlight videos.
When GoPro releases its brand new cameras every year, you see this beautiful highlight reel. It shows the most incredible shots with extraordinary colors, vibrancy, contrast, and all this beautiful stuff in these shots. And you get excited, thinking your shots will also be incredible.
Then you get your GoPro, start shooting with it, and you’ll probably be disappointed that your footage doesn’t look as advertised. It’s the same with any camera you purchase. You’d likely be equally disappointed that your iPhone photos don’t look like they do on Apple’s website.
Why Your Footage Doesn’t Look As Good
The reason your footage underwhelms is there is so much work put into professional color grading for those promo vids. Color grading is one of the most important ways to bring your story to life.
If you know what you’re doing, you can take a gray sky and make it seem like a beautiful, fiery red sunset. Now, color grading is an art. It’s something that takes months and years to get good at. So you want to make a wow video versus a meh video, then learn to color grade.
Color grading is like getting a set of playdoh. You’ve got all these beautiful colors, and it’s up to you to mold them into the story that you want to tell. It’s exciting, but it’s also a lot more work.
10. Effects Are Gimmicky

The 10th and final tip is to mostly forget about effects. Don’t overdo effects like crossfades or the wacky little drizzle effect that brings on the next frame.
How do you know when or how often it’s okay to use effects?
It depends on who your audience is or what your goal is. If you’re just trying to make a nice fun home video, go ahead, and use those.
But are you trying to make a professional-looking YouTube video that you want to be proud of and can share with other people?
Then cheap effects will definitely make your stuff feel a little bit beginner.
Christian claims he doesn’t use any post-production effects to make a travel video. He used to, but now he does all his effects manually to make his video interesting.
What does it mean to do effects manually?
It means he’s doing stuff with his camera, like the hand motions we discussed earlier, to create cool transitions. Or he’ll crop in on his video when editing for a zoom look. But he avoids the plug-and-drop effects completely.
Cut! That’s A Wrap
That’s it for our edition of YouTube travel video tips from the man, the myth, the legend himself.
If there’s anything to take away from this, it’s that he has been so successful because he is doing something he truly loves. He loves traveling and exploring, but he also loves filmmaking and sharing his stories with others. So he’s found the perfect blend of skill and interest to build a business around.
And that interest provides all the motivation he needs to constantly learn and try new things. You can start to implement some of his tips right away. But every single one of his 10 tips has levels to it. And they take a lot of time, practice, and experience to unlock.
If you want to shave some time off of how long it takes to get to his level, there’s one major decision you can make. And that’s to outsource your video editing to a pro who already has the skillset needed and save your time in the process so you can focus on creating more click-worthy content – and having a life.
Almost every tip we shared today somehow involves post-production or editing skill to bring his idea to life. And those skills take years and a lot of sacrificed time to acquire.
So if you already make some money from your channel and want advice or help with your video editing, then drop us a line, and we’d be happy to chat.
Or if you want to read on and learn more – check out these fine reads next!
10 Ways To Improve Your Smartphone Videos
2023 Creator and Influencer Conferences
Get Your Videos Edited Professionally With A Youtube Video Editing Service